This blog post explains how I connected to the internet through a 4G/LTE sim card that has no credit or data allowance by setting up a socks5 proxy on a remote server and creating a DNS tunnel between my local device and that remote server.
What?
- We can use Dante as a socks5 proxy on a remote server.
- We can use Iodine to create a DNS tunnel between our local device and the remote server.
- We can connect to the remote server’s socks5 proxy via the DNS tunnel to access the internet.
Why?
I don’t know really… Just for fun?
Who knows, you might be in a scenario where you have a 4G connection, and have no credit or data allowance, and just really want to check out my latest tweets.
If your connection allows you to make DNS queries for arbitrary domain names without needing to have credit on your account, you can use a DNS tunnel to access any other server on the internet.
I want to let you know upfront, before you try this, that it will be extremely slow. You’re not going to see gigabit network speeds, let alone megabit speeds. You’ll probably only see a few kilobytes per second, at best. Either way, this network connection could be useful in some situations.
How?
Iodine creates a network tunnel by acting as a domain name server.
When your local device sends a DNS request for a domain name, it will be sent to your carriers’ DNS server, which will then look up the name server associated with the domain being queried.
Your carriers’ DNS server will then query that name server and return the result. This is known as a recursive DNS server.
We will configure the name server for our domain to be our Iodine server. This will make the carriers’ DNS server query our remote server when we ask it for DNS records.
By using Iodine as our custom domain name server;
-
Your local device can send data to your remote server by encoding network packets in the domain name it requests the DNS records for.
-
The Iodine server can then send data back to your local device by responding to the DNS queries with encoded network packets in the DNS result.
-
A two-way connection is established by sending ping packets from the local device to the remote server every so often. This allows the remote server to send packets to the local device.
Iodine will create a network and assign an IP address to your local device and remote server. Packets sent between these IP addresses will travel through the DNS tunnel.
Requirements
To set this up, you will need a few things;
- A domain name, such as
mydnstunnel.com. - An Ubuntu 22.04 server with a public IP address to act as the Iodine and socks5 server.
- A device that will allow you to query a DNS server for free. You could use one of the following;
- A 4G/LTE USB Modem.
- A mobile phone with a sim card that can act as a WiFi hotspot.
- I’m using a MikroTik LtAp Mini with a sim card as it gives me full control of all routing.
Domain Name
Once you have registered a domain name, you will need to configure a couple of DNS records. These are the subdomain records that Iodine will communicate through.
If you registered the domain mydnstunnel.com, configure the following DNS records;
- Create an
NSrecord fort1.mydnstunnel.comthat points tot1ns.mydnstunnel.com. - Create an
Arecord fort1ns.mydnstunnel.comthat has the Public IP of your remote server.
t1stands forTunnel 1, andt1nsstands forTunnel 1 Name Server. You can use anything, as long as it has the format{any}.mydnstunnel.comand{any}ns.mydnstunnel.comand both records have the same value as each other for{any}.
Before proceeding further, you should check that your 4G/LTE connection is able to fetch the DNS records you just configured. Try with your carrier DNS server, probably used by default, otherwise try through Cloudflare or Google’s DNS servers to see if your carrier allows access to arbitrary DNS servers.
# check that your carriers' DNS server will return your DNS records
dig t1ns.mydnstunnel.com

# check if your carrier allows you to access other DNS servers
dig t1ns.mydnstunnel.com @1.1.1.1
dig t1ns.mydnstunnel.com @8.8.8.8
dig t1ns.mydnstunnel.com @208.67.220.220
dig t1ns.mydnstunnel.com @208.67.222.222
If you are able to see the public IP address that you configured for your domain, then Iodine should work for you.
If you can’t see the DNS records for your custom domain, your carrier might block DNS traffic when you don’t have any credit or data allowance. In this case, Iodine will likely not work for you at all. But feel free to continue and see if it does anyway.
Remote Server
We need a remote server to run the Iodine Domain Name Server, and also a socks5 proxy. I’m going to use an Ubuntu 22.04 server with Dante as the socks5 proxy.
# install dante
sudo apt update
sudo apt install -y dante-server

# remove default dante config
sudo rm /etc/danted.conf

# add dante config
sudo nano /etc/danted.conf
Add the below config to /etc/danted.conf.
logoutput: syslog
user.privileged: root
user.unprivileged: nobody
socksmethod: none
clientmethod: none

# This only allows traffic to our DNS tunnel IP.
internal: 192.168.99.1 port=1080

# This is the interface for outbound proxy traffic.
external: eth0

client pass {
    from: 0.0.0.0/0 to: 0.0.0.0/0
}

socks pass {
    from: 0.0.0.0/0 to: 0.0.0.0/0
}
After saving the dante config, restart the service.
sudo systemctl restart danted
Next we need to download and build Iodine on the remote server.
# install iodine dependencies
sudo apt update
sudo apt install -y cmake net-tools pkg-config zlib1g zlib1g-dev

# download iodine
git clone https://github.com/yarrick/iodine

# build iodine and move to bin
cd iodine
make
chmod +x ./bin/iodined
sudo cp ./bin/iodined /usr/local/bin
Now that iodined is installed on the remote server, you can run it with the following command;
iodined -f -DD -P password -c 192.168.99.1/24 t1.mydnstunnel.com
This is what the flags do;
-fwill run Iodine in the foreground.-DDwill output verbose logging so you can diagnose any issues.-P passwordsets the password for the DNS tunnel. Use the same password on the client and server.-cwill disable checking the IP/port of the client on each request. Only use this if your network is unstable.192.168.99.1/24is the network where the DNS tunnel will run on the remote server. You can change this, but make sure to update the IP in the Dante config aswell.t1.mydnstunnel.comis the domain name you chose, including the tunnel name prefix you added in your DNS records.
You’ll want to run Iodine in the background to keep it running when you disconnect from the remote server, but while testing you can use the -f flag to run in the foreground. Ctrl+C will stop the Iodine server.
Note: the server executable is
iodined, and the client executable isiodine(without thed).
Local Device
The next step is to connect your local device to your carrier network through your 4G/LTE modem (or whatever device you chose to use).
Then download and build Iodine for your local device. I am using macOS, and didn’t need to install any dependencies, but your setup might be different.
# download iodine
git clone https://github.com/yarrick/iodine

# build iodine
cd iodine
make
Now that you have Iodine on your local device, try to establish a DNS tunnel to the remote server.
sudo ./bin/iodine -f -P password t1.mydnstunnel.com
-fwill run Iodine in the foreground.-P passwordsets the password for the DNS tunnel. Use the same password on the client and server.t1.mydnstunnel.comis the domain name you chose, including the tunnel name prefix you added in your DNS records.
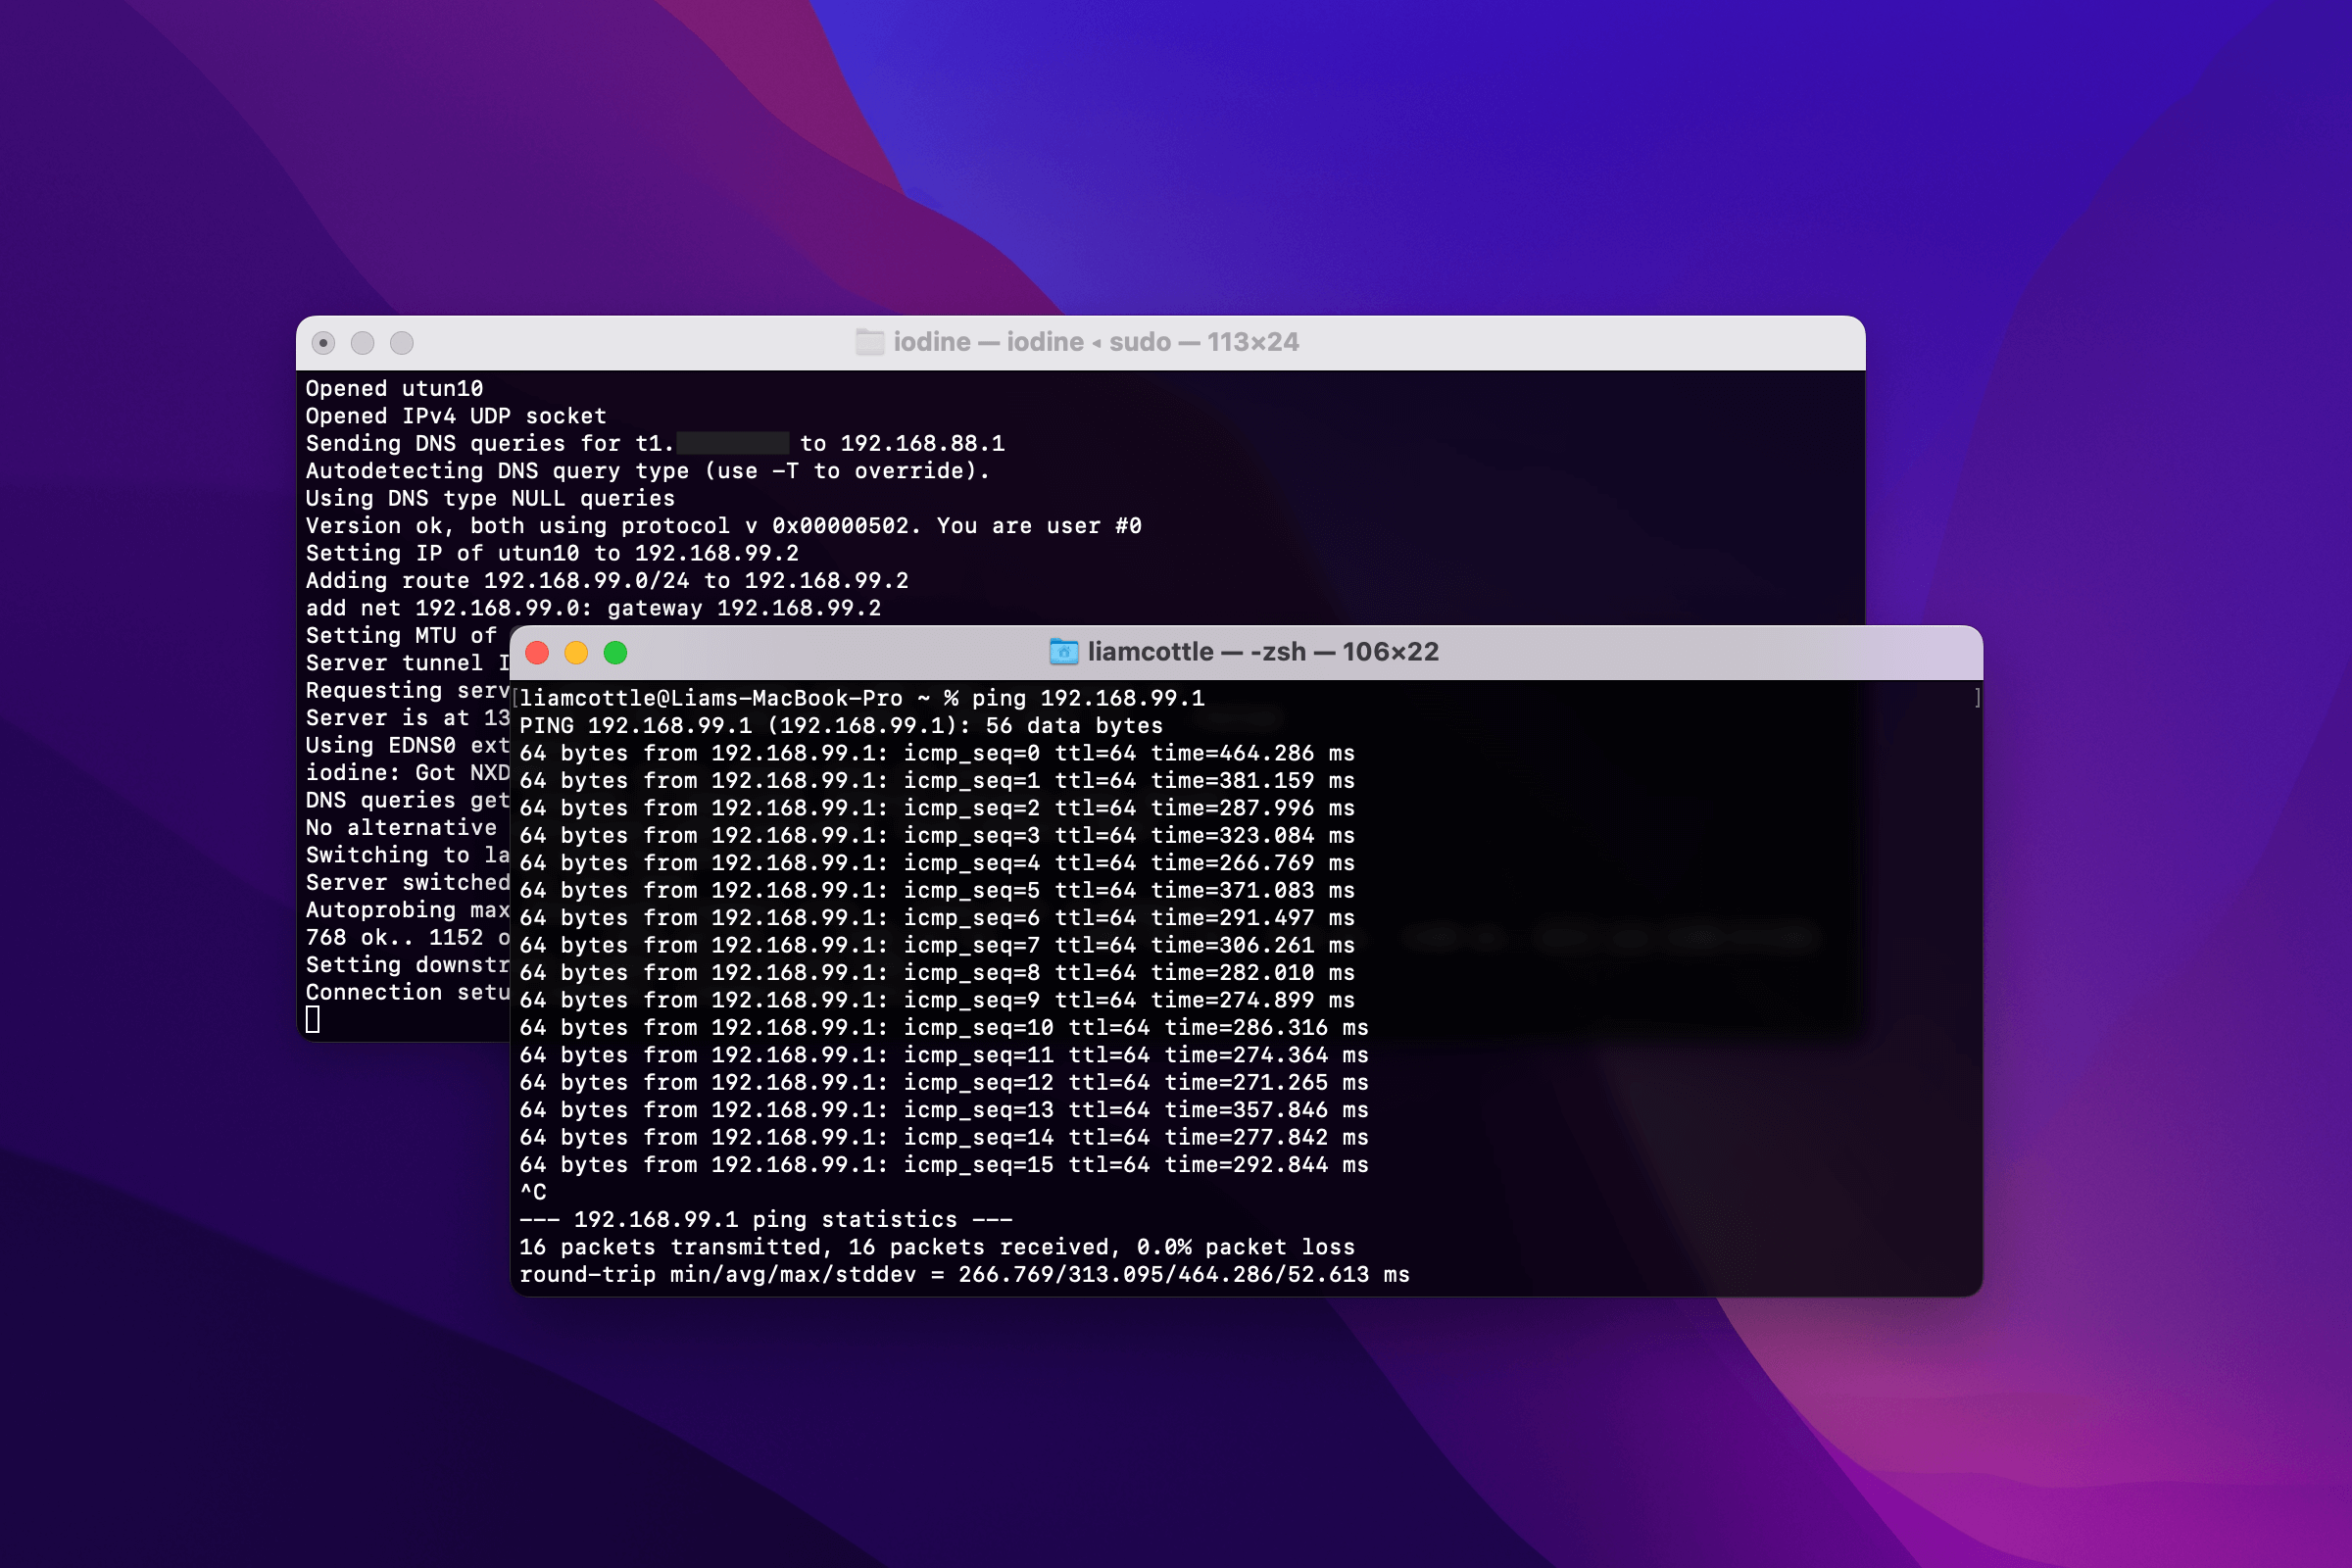
If all goes well, you should now have a DNS tunnel running. Try pinging the remote server through the tunnel.
ping 192.168.99.1
Then, try pinging your local device from the remote server.
ping 192.168.99.2
Note: Your local and remote device IPs might be different. Check the output after running Iodine for the correct IP addresses.
Now what?
Now you have a DNS tunnel established to your remote server. You could use curl to make http requests through the socks5 proxy via the command line, or you could configure your local device to use the socks5 server as a global proxy so all traffic goes through it.
curl -x "socks5h://192.168.99.1" http://canhazip.com
Troubleshooting
If you’re having trouble pinging the remote server from the local device when the connection is established, make sure any intermediate DNS servers aren’t caching the query results.
For example, in my setup I have MikroTik RouterOS as the main DNS server. You should configure this to have a low TTL for DNS caching, or change your local device DNS servers to your carrier DNS servers to remove the extra DNS server.
The maintainers of the Iodine server also have a handy tool to check that your Iodine server is configured correctly.
Handy Snippets
# SSH into the Remote Server via DNS Tunnel
ssh root@192.168.99.1

# SSH into any server via the socks5 proxy through the DNS tunnel
ssh -o ProxyCommand='nc -x 192.168.99.1 %h %p' user@server
Future Research
- Maybe investigate running wireguard on the remote server instead of using a socks5 proxy.